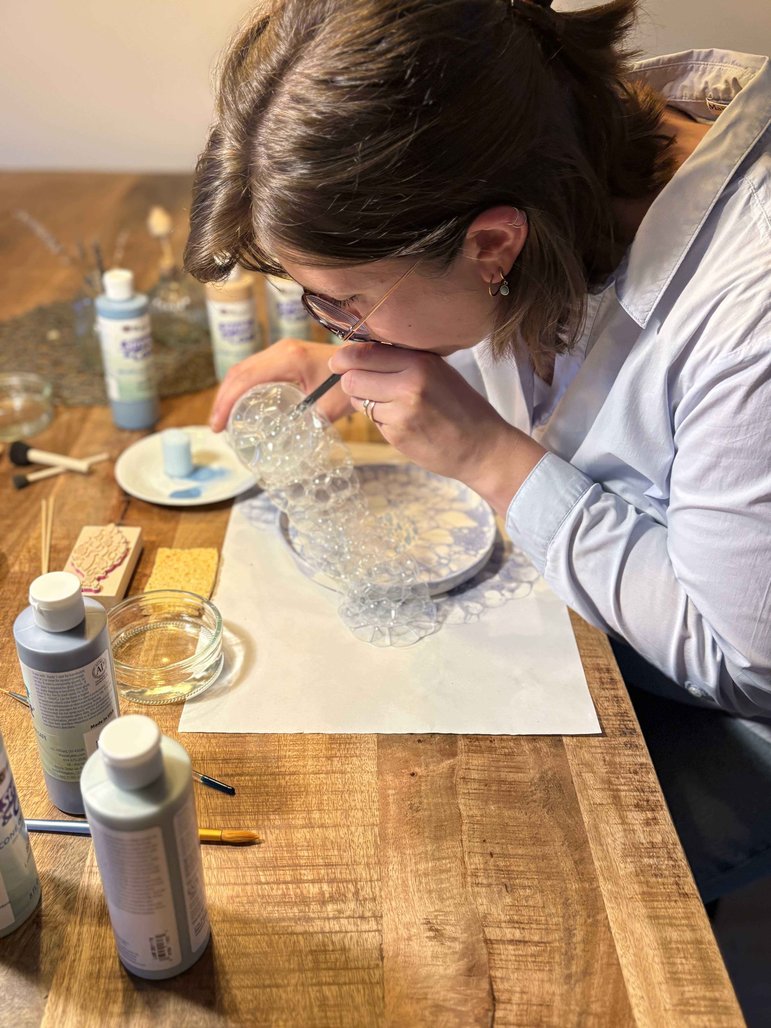
Advanced

Bubble painting

The bubble technique produces a playful, organic pattern of overlapping circles. You mix underglaze with washing-up liquid and water, blow bubbles and let them burst on the ceramic. No two results are the same! What do you need? Ceramic piece of your choice Liquid underglaze Washing-up liquid Water A straw or bubble blower A small bowl How it works Mix underglaze in a bowl with a splash of washing-up liquid and a little water. Blow bubbles through a straw into the mixture until you have a generous foam layer. Carefully let the foam fall onto your ceramic and wait for the bubbles to pop. The bubble edges leave a circular pattern on the ceramic.

Continue reading

Screen printing

With screen printing you can apply razor-sharp, repeatable patterns to ceramics. You push thickened glaze through a fine mesh screen or stencil, transferring the design precisely onto the surface. What do you need? Ceramic piece of your choice Screen printing screen with design, or a self-cut stencil Liquid underglaze Squeegee or spatula How it works Place the stencil or screen flat on the ceramic. Apply a layer of thickened glaze to the screen and spread it evenly through the mesh with a careful rotating movement of your finger. Lift the screen carefully straight upwards. Let the design dry thoroughly before moving the ceramic.

Continue reading

Sgraffito

Sgraffito is an ancient scratching technique in which you use a scratching tool to cut through a layer of paint to reveal the ceramic or an underlying colour. The result has a beautiful relief-like character. What do you need? Ceramic piece of your choice Glaze Scratching tool (satay skewer) How it works Apply a thick layer of glaze to the ceramic. Let it partially dry but make sure it is not completely dry yet. Then scratch your design into the paint with the tool: lines, patterns or drawings. The base surface is revealed. Wipe away the paint crumbs with a dry brush. This technique looks best with darker colours.

Continue reading

Sketching first

Sketching first means drawing your design in pencil on the ceramic before you start painting. This gives you a guide and prevents you from having to change direction halfway through. What do you need? Ceramic piece of your choice Ordinary graphite pencil (not too hard a point) Optionally a soft eraser How it works Draw your design as lightly as possible onto the ceramic. You simply paint over it — the pencil lines disappear during firing.

Continue reading